Showing posts with label technology. Show all posts

Making Life Easy with Symbaloo


Do you Symbaloo? Symb-what? Ok, behind everybody does by now… but if you don’t use Symbaloo you must!  Symbaloo is a website of your favorite websites!

I don’t recall when exactly I first started using Symbaloo… sometime after my work computer had to be reimaged 4 times my first year teaching and I lost all of my saved favorites over and over again. I can’t function without access to my favorite websites.

So, let me take you on a tour of my Symbaloo and how I use it.


This is my homepage when I open up Chrome. You can see I like it organized.

So, it is a great place to save your favorites because you will never lose them since it is on the web versus on your computer. But what else is it good for?

Raise your hand if you ever show a short video as a hook. Exactly! Everybody! Now, there are ways to get around the ads on You Tube, but Syabaloo not only does that, but it can also be a place to house all those clips year are after year.

At the top of your ‘homemix’ you can add tabs or ‘webmixes’. I added one for each subject.

Within each different tab I can save all my web resources for that content area. Simple! Genius!


Here is a peak at some of my tabs/webmixes.


I just cleaned this one up. I use math videos all the time, some better than others, and some needed to go.

What else is cool about Symbaloo… you can create a webmix to share and save Google Drive documents. Say what?! YES! You can save your google docs to a tile on Symbaloo, just make sure that you allow access to share.

I have complied some great webmixes that other people have put together, all in one great place…. where is this list? Pinterest of course! Check it out, and I hope you fall in love with Symbaloo just as I have!

If you have any other great ways you have used Symbaloo I would love to hear about it.

Using Infopics in the Classroom


Wait, what is an infopic? An informational picture, of course!
You’ve probably made one, just never thought of what it would be called. On my first day of summer vacation I attended a technology conference, where I got to hear Tony Vincent speak about how to create infopics.  When you see something you are more likely to remember it. That got me thinking… how can we use these in our classrooms.


First of all, Tony has an awesome list of apps you can use to create infopics (iOS and android). Here are a few that I love, that are also user friendly for the students.

Now that you have the apps to make them, let’s stick them in some lesson plans. But how?

1. Famous People: Describe those historical figures you have been teaching about.


2. Vocabulary: Find a picture and add the definition, synonym, antonym, or use it in a sentence.

3. Classroom Procedures & Rules: Have students take pictures of symbols for certain class procedures and describe it.


4. Math Problems: Have students write their own real world problem, then have a partner solve.

5. Book Reviews

6. Figurative Language: An idea for a culminating project could be to create an infopic for each type of figurative language (simile, metaphor, personification, idiom, etc.)

Infopics are relevant to today’s culture. Kids have seen them floating around the internet… have you showed them a funny meme? Why not make learning fun by creating this connection, and helping them remember the content through use of visuals!

Student Organization: The Good, the Bad, the Ugly


My classroom has undergone some big changes this year. For those that follow my blog you know I have an Inspired Classroom this year! You read more about it HERE. With the Inspired Classroom I decided to switch from desks to tables. Tables allow my students to collaborate better. They can easily pass the keyboard around (yup, it is wireless!) and scoot closer to see the screen.
 
Well, getting rid of desks meant I had to figure out where to put ALL their STUFF! I thought I had it all figured out going into the first day of school, well some things worked and some failed miserably. Here is what I learned.
 
 
I needed the kids to be able to easily access their supplies. The first thing I did was make cute aprons for the back of their chairs. (See my original post of these aprons HERE)They were going to perfectly rest on their chair legs with the help of hot glue... well that lasted for about ONE hour.  The kids kicked them loose. I found myself bonding with my hot glue gun every morning for about two weeks before I gave up on them. Let them be crooked! That was hard for my OCD-self to accept, but I was over it. They are still great for storing the little things.  
 
Their crayon boxes fit perfectly in their aprons. I bought these snack packs from the dollar store this summer. LOVE them! Last year I used travel soap boxes. Those worked too, but these snack packs were two for $1!
 
What about the rest of their supplies?
We use table caddies! I am a firm believer in YOU use what YOU bring (aka No Community supplies). I wrote the kids names on all their supplies the first day and stuck their scissors, markers, color pencils, glue sticks, and erasers in the caddy. (Ok, glue sticks and pencils are for the 'community').
 
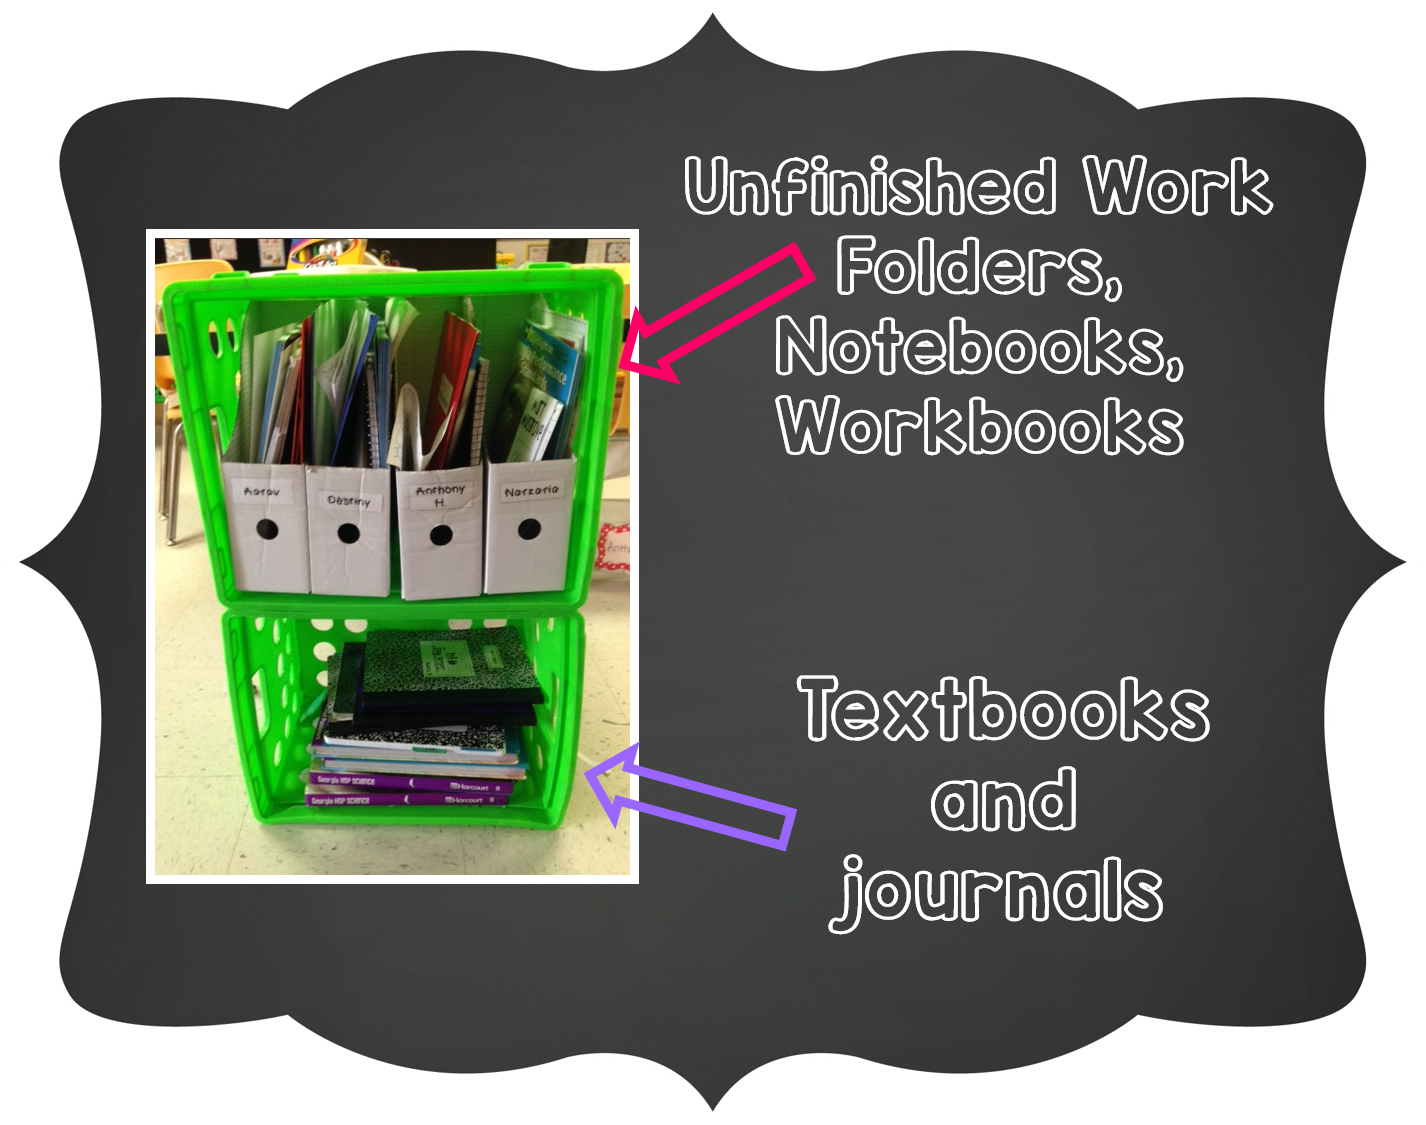
What about their books and journals?
I bought crates from Wal-Mart this summer when they were on sale. I zip-tied two together and there you have it - instant shelf! Each table has their own "bookshelf".
 
Between their "bookshelves", table caddies, and aprons that is really all the storage space they need. Most days I love the tables, some days I miss the desks. Why?
-If you move a student you only have to
move his/her chair.... and all their supplies.
-The bookshelves are much easier to
keep organized... but students have to get
up in order to get out their notebooks.
 
Tables... so far I love them.
Ask me again in May!
 

Get Techy Tuesday {Favorite Apps}

The other week I shared my favorite websites to use in the classroom (see that post HERE). Now, I am excited to share some apps that I have used and recently discovered.
 
 
I have 11 apps to share... some are free and others are paid. Do look into the Apple Volume Purchase Program if you are interested in buying an app that your entire school can use!
Disclaimer: I found these apps on my iPad, so some may not be available for an iPod or iPhone if you use those in your classroom.


What are your favorite apps? Please share!

Get Techy Tuesday {Favorite Website}


 In two weeks I will be venturing out of my comfort zone a bit in order to change things up. This will be my fifth year teaching second grade and each year has come with some sort of change... transferring to EJ (my home away from home), common core standards, and becoming grade chair. So, to keep things interesting I made the decision at the end of last school year to switch to an 'Inspired Classroom' this year.
 
"What are you talking about?" you say. An Inspired Classroom moves the computers away from the perimeter of the room and put them at the students' desks. You can read more about Inspired Classrooms here. To accommodate this switch I am swapping my student desks for tables to allow for full collaboration. It is going to be quite the change, but I LOVE technology and this was an opportunity I could not resist.
 
So, I have been spending some of my summer figuring out how to incorporate more technology into my lessons. I thought I would "Get Techy" and share some of my favorite resources over the next few weeks.
 
This week I wanted to share just a couple of my favorite websites.


Let's look a little closer at some of these fabulous sites:


What are your favorite website? I would love for you to comment and share them with me.
 Next week I am going to share some of my favorite apps.
 

Filling My Time


At the end of the day when my husband comes home and asks what I did today, I often think WHAT did I accomplish? WHAT did I do with my valuable time off? I manage to fill my summer days keeping busy. Between laundry, cleaning, playing with the puppy, or reading the latest Mary Kay Andrews book, I often find myself in my office. I’m either making banners & things on my Cricut or sitting behind the computer. Either way, I am constantly doing something!
After I finished scanning all the files I brought home from my classroom, I moved on to my next tech-savvy project.  I started using my old iPhone and iPod in my classroom toward the end of last year. Well, I found this fabulous idea of Pinterest… convert your listening center tapes to MP3s! Here is the link to the original idea. So, I ordered an AGPTEK USB Cassette Converter off of Amazon earlier this month. It is so easy to use! The only con is that you have to listen to the story while it is recording. (I usually blog-stalk on my phone during that time).
(Here is my recording studio/ office.)
 
I LOVE how Molly at Lucky to be in First has her iPod listening centers set up. If you are thinking of converting your tapes check out her post about ditching the tapes and moving to MP3s.
 
I have also been creating a few new Common Core items! I don’t know about y’all, but I LOVE LOVE LOVE chevron! I have created a few chevron themed items for my TPT store. Check them out:


And here are a few other items I have created recently:
(click the picture to visit my TPT store)